Question categories
- Google calendar integration
- Zoom account integration with Cabinet
- Zoom account change/disconnection
- Launching Zoom online meeting
- Service editing
- Creating new Service
- Schedule setup
- Managing social networks and external websites links
- Intergrating Cabinet.fm widget
- Booking online meeting instead of your client
- Company creation in Cabinet
- Contacts search
- Shifts and non-working hours
- Notifications
- Collect payments
- API integration and webhooks
To effectively set up the schedule of all employees and productive teamwork, Cabinet.fm has a specially created functionality for companies which need to successfully book meetings with a large number of clients online.
The first stage is the creation of a company. To do this, the business owner / general manager should be registered in Cabinet.fm, then
- Go to Companies from the drop-down menu at the top right corner of the page.
- Click New Company
- Upload your logo and cover (if you use the Cabinet as your main landing page)
- Fill in all the fields
- Enter company name
- Enter a description
- Select the time zone to display the schedule for company employees
- Enter the desired address of your landing page
- In the "Meeting cancellation reasons list” click "Add" to enter a reason for cancelling a meeting cancellation. These reasons will be available for selection by your employees in case of cancellation
- Click "Add"
From that moment, the company was created.
Next steps: creation of the services, Zoom integration, inviting employees, creating work shifts for the entire team, setting up analytics and API integration.
In your personal account, in the "Services" section, click on "+Add new service"
-
Complete all the fields
-
Write the service title
-
Select th eservice type "Automatic distribution" so that the system itself distributes the workload between employees when booking clients online for this service
-
Add a service description
-
In the field "Minimum time before booking" will automatically be 3 hours. This means that any meeting with you can be booked only three hours before it starts. If desired, you can choose a different interval in hours
-
In the "Maximum booking time" field, select how many days ahead the calendar will display. Max 90 days
-
Enter the service price or enter zero for a free service
-
Select the duration of the service in minutes
-
In the "Available employees" field, click "Choose all". Subsequently, when your employees join the system, booked meetings will be automatically distributed to them
-
The time zone will be automatically set according to your phone number. If you want to change it, then select the appropriate option
-
Decide on the location of the service: Zoom, Skype, other
-
Add the desired page address for this service. You can specify the desired link address, which will be displayed for the booking after https://cabinet.fm/l/…
-
-
In the "Overbooking rate" field, enter the desired percentage. For example, if you want the overbooking to be 1:2 (one employee can book two clients for one slot), then enter the number 100
-
Click "Create Service"
-
-
In the "Availability" subsection for each employee you can create or select the desired shift from the already created work shifts (working schedule)
-
Click "Create Shift"
-
-
Mark the time slots corresponding to the working hours for each employee. Highlight the permanent schedule (recurring) in blue. For a one-time schedule mark the time slots in yellow
-
Click "Save As" to save the created schedule under a specific name, for example, employee name
-
Now you can assign the created shift to the selected employees in one click:
-
Please tick the appropriate employees
-
Click on the drop-down menu "Schedule shift" and select the appropriate option
-
-
Continue to create the desired number of shifts and assign them to selected employees
-
Click "Update Service"
-
In the "Form fields" subsection, you have the opportunity to create a new field that will be reflected to the client when making a booking with you. For example, Child’s name and age
-
If there is no such need, then you can not make changes to this subsection. Click Save. A modal window will appear informing you that the service has been successfully updated. And with a proposal to tell your friends about this update on Facebook. Select the desired option or click on the cross in the upper right corner to close the message


Now invite employees to join your company in Cabinet.fm.
On the Team dashboard, you will see an invitation link, copy it and send it to employees

After the employees have joined, set up the “roles” of each. To do this, go to the Team management panel again (Go to Companies from the drop-down menu in the upper right corner of the page and then click on the "Information" button)
- Go to the "Team" section
- Next to each employee name, on the right side, click on the "Change Role" button and select from the two options "Expert" (= teacher/employee) or "Administrator"
- Set up roles for each employee
- Ask your employees, after joining the team on the Cabinet.fm platform, to go to "Integration settings" in the drop-down menu in the upper right corner of the page
- In this section, each employee (regardless of role) needs to connect their Google Calendar and their Zoom account so that automatically generated and an event with all meeting data will be automatically created in their Google Calendar. Connection instructions:
- Google calendar: https://cabinet.fm/faq/google
- Zoom: https://cabinet.fm/faq/zoom
! It is important to know that you can connect one Zoom account to one Cabinet.fm account. You cannot use the same Zoom account in two or more Cabinet.fm accounts. In this case, links to meetings will not be generated automatically.
After creating a team, it's time to set up shifts for each employee.
On the Team dashboard click on the "Shifts" subsection

- Click "+Create Shift"
- Mark the time slots corresponding to the working hours for each employee. Highlight the permanent schedule (recurring) in blue. For example, if most of your employees have the same shift from Monday to Friday from 09:00am to 05:00pm, then you mark the necessary days and hours in blue.

- Then click "Save as" and enter the desired shift name, for example, "general office hours"
- After that, you can create the desired number of different shifts for each employee. You create a shift by marking it in blue for a permanent schedule and yellow-beige for a one-time schedule, for example, if an employee asked to work on a different schedule this week

- To integrate employee shifts into a single schedule, return to the service editing stage in the "Availability" subsection and assign the necessary shifts for each employee.
After joining the team on the Cabinet.fm platform, go to "Integration settings" in the drop-down menu in the upper right corner of the page
- In this section, connect Google Calendar and Zoom account so that automatically generated and an event with all meeting data will be automatically created in your Google Calendar. Connection instructions:
- Google calendar: https://cabinet.fm/faq/google
- Zoom: https://cabinet.fm/faq/zoom
! It is important to know that you can connect one Zoom account to one Cabinet.fm account. You cannot use the same Zoom account in two or more Cabinet.fm accounts. In this case, links to meetings will not be generated automatically.
- In the "Schedule" section, all booked and past meetings / lessons will be displayed
- To manage your regular schedule, you will need to create events in the Google Calendar and thereby block the booking slots in the Cabinet system. Any event indicated in the Google calendar as "Busy" automatically blocks the time slot in the Account and does not allow the system to create a reservation for this time.
How to create an event in Google calendar:
- Go to the calendar, for example on your phone, click on the “plus” in the lower right corner and select “Event”
- Fill in the required fields, select whether this event is recurring (daily, weekly, biweekly, monthly, etc.)
- Choose how and when you want Google Calendar to remind you of it


- Click "Save" in the top right corner
- The created event will be reflected in your calendar and block the time slot in Cabinet.fm
- An ordinary employee is aware about a new upcoming booking through from the Schedule section or by receiving email / WhatsApp notifications, etc. (can be configured separately using Zapier / other service)
- 1.1 An employee can reschedule/cancel a meeting following internal instructions, using an event in the Google Calendar or the Cabinet.fm interface - https://cabinet.fm/schedule
- 1.2 In the Cabinet.fm interface, by clicking on “Reschedule”, an employee can select a different slot suitable for the client from all the presented and the system itself will reschedule the meeting by selecting the right employee
- 1.3 When cancelling a meeting, the employee writes down the reason for the cancellation in the comments area
- An employee can change the status of a meeting from “Planned” to “Accepted for work” by clicking on the “Take to work” button in the Schedule section (*mark for administrator) If overbooking is configured in the system and there is a client waiting in the queue, then it will be automatically assigned to another employee. A newly booked meeting will appear in the Schedule section, subsection "Booked"
- After a successful meeting, an employee can create a meeting report in the Schedule section —> "Past" subsection by clicking on the three dots next to the meeting and selecting the "Create report" option
If you choose not to use our online booking widget, then your administrator can manually book meetings and manage the entire online booking process.
During a conversation with a potential client, the administrator is in the Schedule section https://cabinet.fm/schedule
- Click "Book"
- Enter the customer's phone number including the country code (mandatory field)
- Enter the client's first and last name (optional)
- Enter the customer's email address (optional)
- Click "Send booking details"
Rescheduling a meeting
To reschedule a meeting - In the Cabinet.fm interface https://cabinet.fm/schedule, by clicking on "Reschedule" next to the desired meeting, the administrator selects a new slot suitable for the client
Cancellation of a meeting
- In the Schedule section, click on "Cancel" next to the desired meeting, the administrator cancels it by indicating the reason for the cancellation in the comments.
- In the case when the meeting was cancelled, but the client changed his mind and decided to sign up again, the administrator in the Schedule finds the cancelled meeting in the "Booked" or "Past" section and clicks "Reschedule". Then he chooses a slot suitable for the client and books a new meeting.
- If, after booking a meeting, there is a need to leave a comment to other administrators or the owner/managers intended only for them, but not for ordinary employees and not for clients, this can be done by clicking on the "Edit" button next to the desired booking in the schedule
- The comment left will be reflected in the Schedule section
Replacing the person conducting the meeting
- If it is necessary to remove an employee from a scheduled meeting and replace him with another one, the administrator enters the Schedule section
- Finds the required meeting and clicks "Remove Expert"
- Then clicks "Add Expert" and selects the desired name from the list
- After that, the scheduled event and Zoom link are removed from the terminated employee's schedule and calendar. The added employee, on the contrary, has a booked meeting in the calendar and schedule, including a Zoom link.
To view the planned workload schedule for employees based on the schedule
- In the "Services" section, find the desired service and click on the "Edit" pencil
- In the "Availability" section, click on "Workload table"
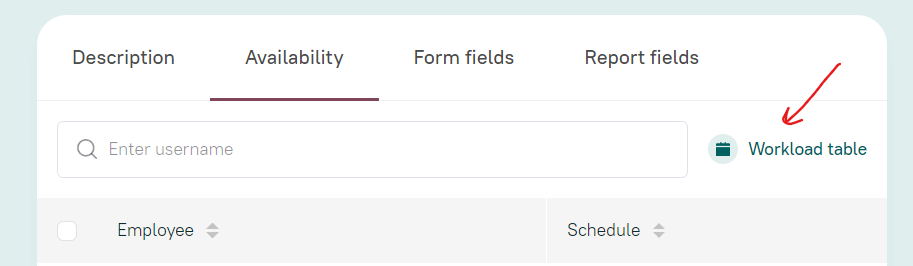
- A heat table will appear showing the workload by employees based on the schedule specifically for this service
- The "Filter by experts" field makes it possible to see the workload table of a particular employee or several selected emplpyees
To find a client card
- In the "Schedule" section, go to the desired subsection "Booked" or "Past"
- Find the client name you need: type in the data in the search bar or find the desired meeting in the schedule
- Click on the client's name

- A client card will open with all contact details, booking history, company comments and generated reports
Create a new service following the instructions in the section How to create a service for online booking
- Type of service, select "Group meeting"
- Mark in the column "Available employees" the necessary employees
- In the "Availability" section, select or create the necessary shifts for each employee involved in this service
- Click "Update Service"
- In the Form fields subsection, you have the option to create a new field that will be displayed to the client when registering for an event. For example, child’s age
- If there is no such need, then you can not make changes to this subsection.
- Click "Save"
The administrator, when talking with the client, books a place for them in a group meeting, acting as usual, while the calendar will display the number of free places in the group
*Facebook, Linkedin, Instagram - запрещены на территории РФ